A successful custom Christmas sweater has two jobs: communicate the design clearly and arrive while people still want to wear it. A crowded illustration, an unreadable logo or a missed warehouse date can undermine an otherwise good product.
For brand collections, company events and merchandise programs, start with a production brief that connects artwork, fabric, sizing and delivery. This guide explains the decisions to make before approving a bulk order, including a worked stitch-grid example and an illustrative backward schedule.
1. Define the product before drawing the artwork
Write down who will wear the sweater, where they will wear it and what success means. A staff party sweater may prioritize a recognizable company joke. A retail collection needs a design customers will choose without knowing the business. A recurring merchandise program may benefit from artwork that works beyond one dated event.
Choose one central idea, one supporting pattern and a clear place for branding. When a logo, slogan, snowflake border and character all compete at the same scale, the concept becomes difficult to read. Start with a rough front-and-back sketch and mark the non-negotiable elements.
Specify the garment as well: crewneck or another neckline, intended fit, sleeve length, fabric feel, approximate weight preference and whether it will be worn over a shirt. Browse custom Christmas sweaters and custom Christmas jumpers to organize visual references, then annotate what you want from each reference.
2. Separate knitted artwork from surface decoration
In a knitted motif, yarn colors form the design as the fabric is made. In a printed sweatshirt, the image is applied to an existing fabric surface. Sweatshirt fabric can itself be knitted; the useful distinction is how the artwork is produced.
| Decision | Artwork knitted into the sweater | Artwork printed on a sweatshirt |
|---|---|---|
| Image detail | Depends on the available stitch grid and yarn behavior. | Depends on the print method, substrate and production settings. |
| Design approval | Check a knitted swatch and garment sample. | Check a print sample on the intended fabric. |
| Fabric interaction | Colorwork structure affects the fabric and reverse side. | Assess surface feel, coverage and behavior after care. |
| Useful brief | Motif dimensions, yarn colors, placement and structure. | Print dimensions, placement, colors and application method. |
If the goal is a traditional knitted holiday look, put “artwork knitted into the fabric” in the brief. Embroidery or patches can be separate options for fine branding details, but ask to review their appearance, backing and cost before selecting them.
3. Design for the stitch grid
A high-resolution logo file does not automatically produce high-resolution knitting. SHIMA SEIKI describes jacquard artwork conversion as a pixel-based process in which each pixel corresponds to a stitch, with proportions adjusted for the knit. See its guide to knitwear design and virtual sampling.
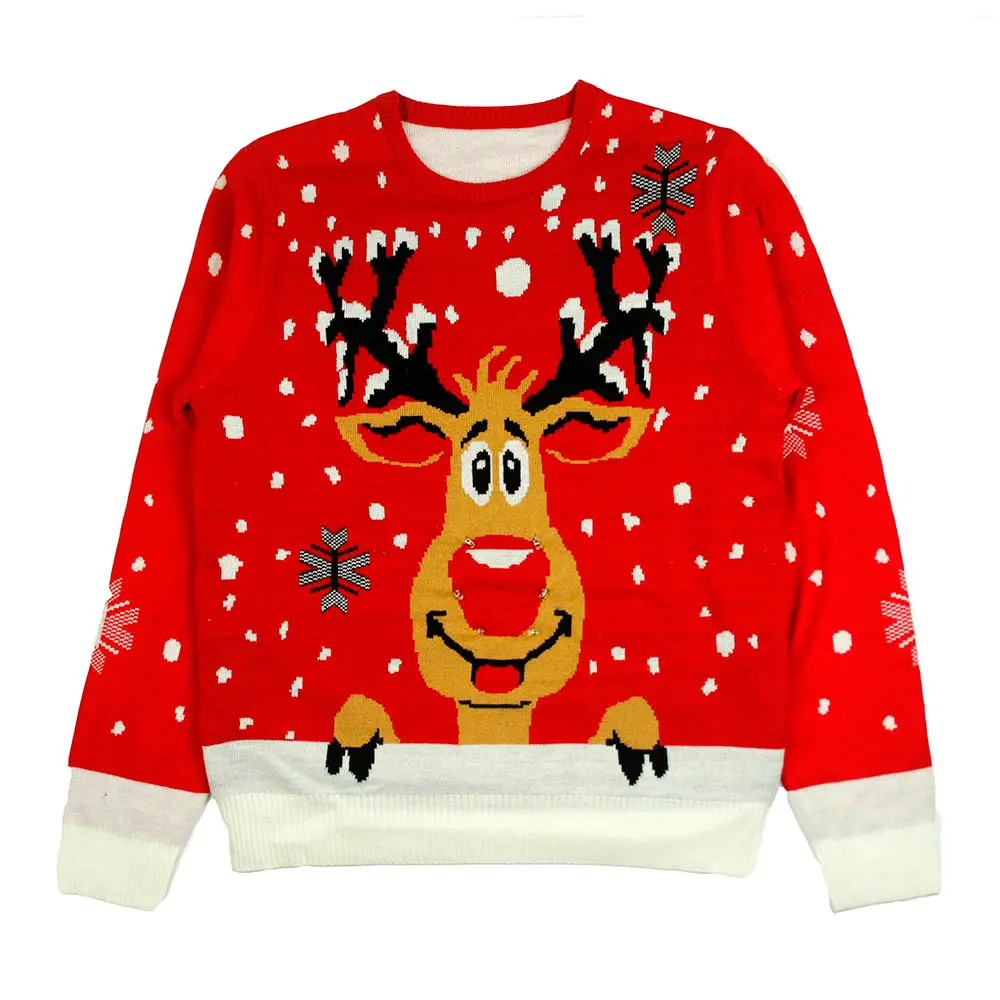
Request a stitch-grid preview at the intended physical size. Remove subtle shadows, simplify gradients into deliberate color areas and open up small gaps between letters. Check recognizable features first: a reindeer's antlers can survive simplification, while tiny facial details may disappear.
A worked example: why a small slogan can fail
Suppose a finished trial swatch measures 4 stitches per centimeter horizontally and 6 rows per centimeter vertically. These are hypothetical measured values, not a machine specification. An artwork area 20 cm wide by 15 cm high would contain approximately 80 stitch columns and 90 rows.
Now allocate 10 cm of width to an eight-letter word. That gives only 40 columns. If seven gaps each use one column, 33 remain for the letters: roughly four columns per letter on average. A narrow font with counters and decorative serifs will have very little room. Widen the word, shorten it, simplify the lettering or consider a separate decoration method.
Do not substitute machine gauge directly into that calculation. For common V-bed flat knitting machines, machine gauge describes needle density; SHIMA SEIKI's knitting glossary defines it as needles per inch. Use the actual proposed fabric's finished stitch density to assess artwork dimensions, because yarn, structure and finishing affect the result.
4. Review colors per row and logo readability
A design with six colors overall can distribute those colors across separate horizontal bands. Another six-color design may need all six within the same pattern row. Give the factory the artwork and ask it to assess color use across rows, rather than judging complexity from the palette count alone.
STOLL's jacquard programming documentation distinguishes processing all selected colors from processing the colors present in a particular row. It also includes reverse-side and float settings. That supports a practical buying question: what structure and color sequence does this design require? It does not establish a universal color limit or price formula.
Ask whether a repeating jacquard, localized intarsia or combination suits the concept. Our intarsia versus jacquard guide explains the trade-offs. For a deliberately busy custom ugly sweater, keep the brand mark surrounded by enough plain space to remain visible.
- Review lettering at actual garment size and at conversational viewing distance.
- Compare physical yarn colors; a screen preview is not a final shade approval.
- Check the contrast of adjacent colors, especially dark red against dark green.
- Confirm motif placement on the smallest and largest sizes, including sleeve seams.
5. Build size quantities from evidence
For a company order, collect selections using the approved garment measurement chart, not a generic S–XL chart. Explain how to compare a sweater people already own, and include the intended fit. Track responses by delivery location if the order must be split across offices.
For retail, use relevant previous sales, preorders or a considered demand estimate. A size distribution from an unrelated product is a weak starting point. Record the assumptions behind the quantity mix and keep any exchange reserve separate so it is not accidentally counted as saleable launch stock.
Specify whether measurements are taken flat, where each point starts and ends, and the agreed tolerances. Check artwork scaling separately from garment grading: making the body wider does not automatically mean the logo should grow in the same proportion.
6. Approve the sample as a production reference
A digital mockup can settle layout questions. A physical sample lets you evaluate the fabric, fit, construction and design together. Record any substitute yarns, colors or trims so approval does not accidentally cover details the sample cannot demonstrate. Record the sample version and consolidate comments into one document with a named approver.
- Artwork: inspect lettering, motif edges, front-to-back consistency and placement against the approved drawing.
- Fabric: examine opacity, feel, stretch recovery and the reverse side. Look for areas that may catch during dressing.
- Fit: measure the agreed points and try the sample over the intended base layer. Check neckline access and sleeve movement.
- Care: agree the relevant care procedure and evaluate appearance and dimensions afterward. Photograph and record the conditions.
- Finishing: confirm seams, ribbing, labels, packaging and size identification before release.
Separate approval from requests still awaiting evidence. “Approved except for revised lettering” leaves a material design issue unresolved. Obtain confirmation of that change before authorizing the affected bulk production. Use a sweater tech pack to keep the final specification together.
7. Work backward from the date stock must be usable
Your target is the date goods must be received, checked and ready for use or sale. That may be weeks before the party itself. Confirm supplier capacity, yarn availability, sample revisions and the shipping route before committing to a launch.
The following 18-week allocation is an illustrative planning exercise only. It is not KnitCustom's lead time or a recommended schedule for every order. Replace every allowance with confirmed information; some projects need considerably longer. This example uses calendar weeks and sequential stages. Confirm any overlap, working-day estimates and holiday closures in the actual plan.
| Window before usable-stock date | Illustrative allocation | Dependency to resolve |
|---|---|---|
| 18–16 weeks | Brief, artwork review and commercial agreement | Named approver, quantities, destination and product specification. |
| 16–12 weeks | Yarn review, swatch and sample development | Material availability and time for one planned revision loop. |
| 12–11 weeks | Final approvals and order release | Approved sample, size breakdown, labels and agreed payment conditions. |
| 11–5 weeks | Bulk manufacture, finishing and inspection | Confirmed production slot and materials ready when needed. |
| 5–2 weeks | Booked transport, clearance and local delivery | A route-specific logistics estimate; three weeks may be inadequate. |
| 2–0 weeks | Receiving, allocation and contingency | Warehouse capacity, distribution lists and action on shortages. |
Give each approval and shipment milestone a named owner and a decision date. If sampling uses an extra week, record which later milestone moves. Do not quietly consume the receiving buffer or assume production can be compressed. For an inflexible event, reducing design complexity or choosing an available yarn may be worth evaluating with the supplier.
8. Send a brief that supports a useful quotation
Include these details in your first email:
- Audience, intended use, destination and required usable-stock date.
- Estimated quantity by design and colorway, with the size breakdown when available.
- Front, back and sleeve artwork; logo files; motif dimensions and placement notes.
- Preferred fabric feel, fiber requirements, fit references and measurement chart.
- Brand color references, labels, packaging and delivery splits.
- Budget assumptions, sample approval contact and unresolved decisions.
Ask the quotation to identify development charges, minimums, included packaging, shipping assumptions and the point at which production timing begins. Compare offers against the same specification.
Frequently asked questions
Can a detailed company logo be knitted exactly?
Some logos translate well; fine lines and small lettering may need adjustment. Review a stitch-grid version and physical swatch at the intended size. Obtain internal brand approval for any simplified version.
How many colors can a Christmas sweater use?
There is no useful universal answer without the artwork, construction and production setup. Separate total palette size from colors needed within each row, then request a feasibility review.
When should we order company Christmas sweaters?
Work backward from the received-and-checked date using confirmed development, production and transport allowances. Include approval time and contingency. A supplier's production estimate alone does not cover the complete calendar.
Should every size use identical artwork dimensions?
Sometimes that maintains consistent branding; sometimes it crowds the smallest size. Define the placement rule and ask to review the size extremes before finalizing it.
For a small seasonal run, use our low-MOQ sweater sourcing guide to check how quantities split across designs and colors. Our custom knitwear services provide a starting point for discussing the design and sample work your order needs.
Technical references
Plan your Christmas sweater project
Email your artwork, quantities by size and color, delivery destination and the date the goods must be received and checked. Include any brand details that cannot be simplified.
Email info@knitcustom.com